Posts

Git log - commit history

Image
Here is the GitOps story! we started learning more depth of every GIT commit history using git CLI. In this post, we have touched some rea-time scenario-based question and answers with practical examples which are useful for other DevOps team members.  The best question to help release management - who worked on the critical program/script which is in the release process? This can be found using the git log command.  The most interesting story if someone left the company and need to know what he did in his last commit. Tracking changes all of them done by that particular user.  The git log having many options: sorting filtering output formatting Let's see in detail by with experimenting each with an example. How to get the git log in a "Sorting order"? Here we have a couple of sorted commit history commands.  Using the --pretty value with  Oneline to going to give you the log output in simplify format. git log --pretty=oneline The output combination of ...
Git install latest version on Oracle Linux

 Hey! In this post I would like to discuss about git installation on Oracle Linux. By default git from the yum repo version is older 1.8.2. To get used of the latest features of git needs to install the latest version of git. Currently, the git version is 2.30.1. But this experiment will be same further as well. Step 1: Navigate to a path where the git installer needs to download. cd /opt wget https://mirrors.edge.kernel.org/pub/software/scm/git/git-2.30.1.tar.gz #remove the default git version from yum repo yum remove git -y # extract the git tarball tar -zxf git-2.30.1.tar.gz cd git-2.30.1 Step 2: The prerequisites for git installation is as: # prerequisites yum install curl-devel expat-devel gettext-devel openssl-devel zlib-devel -y yum install gcc perl-ExtUtils-MakeMaker -y Step 3: Install the git version # installing latest version of git make prefix=/usr/local/git all make prefix=/usr/local/git install Step 4: Now all set, we need to have the latest git i...

Publishing to Docker hub your own Docker Images

Image
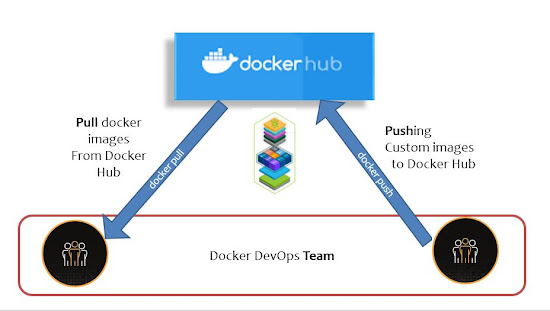
 Hey DevOps Engineer, In this post I would like to share my experiment on Docker image creation and pushing to the public repository. Docker Hub is the world's easiest way to create, manage, and deliver your images with the teams who are working for microservices applications that runs on containers. Docker Hub allows you to pull docker images that are built by other community members, organizations on the Hub.  Docker Hub is a cloud-based registry service that allows you to link to code repositories, build your images and test them, store manually pushed images, and links to Docker Cloud so you can deploy images to your docker hosts. Publishing custom Image to Docker Hub Steps to publish the image Please use the following steps: Register with Docker Hub Login to docker hub from your Docker Host  Commit and Pushing to Docker Hub registry Docker tag Create an account/ Docker ID. If you have already then signed into it. Login into the docker hub from the docker host  ...

Jenkins Slave on AWS EC2 instances with SSH configuration

Image
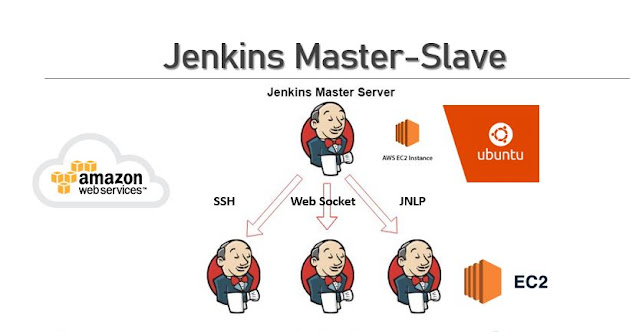
After c onfiguring the  Jenkins Maste r we need to configure the slave or agent on EC2 instance. There are various methods to connect with the Slave node. In this post,  I would like to share the SSH key-based remoting method. Pre-requisites Jenkins Master already Up and Running Java (JDK) installed on the Slave node Here we are in the slave machine and proceed with the following steps for configure a SSH based Jenkins slave. How to create user and generate ssh-key on Slave? Login to slave node terminal using ssh or PuTTY switch to root user.  useradd jenkins_slave mkdir -p /home/jenkins_slave usermod -d /home/jenkins_slave jenkins_slave tail -1 /etc/passwd # To check useradded to userlist Now switch to the newly created user 'jenkins_slave'. sudo su - jenkins_slave SSH Key generate for 'jenkins_slave' user with the following command: cd .ssh ssh-keygen -t rsa -N "" The above command will create two files in /home/jenkins_slave/.ssh folder id_rsa (p...

Learn how to use git tag for Code Revisions

Image
In this post, let's do an experiment with git tag command options. In GitOps we need to know what is a tag? How many types of git tags? We will learn about Creating, deleting, and listing tags for a project repository. Once everything is done, we need to know how to push the tag to the remote repository. Work tree for git tag creation Why git tagging? Tagging is used to mark a commit stage as important We can tag a commit for future references  Typically tagging wiil be used to book mark release points in a Project. Annotated tags will be recommend where you are working in team and collaborating for a project development. Before you start on git tag You must have a GitHub or GitLab account to work on a remote repository. Knowledge of basic repository creation on these Git clouds. On your git client shell (git bash as well) you must create the global user identity entries in the configurations. [vagrant@mydev tags_handson]$ git config --list user.email=bhavanishekhar@gmail.com user...

Configuring Fresh Jobs in Jenkins

Image
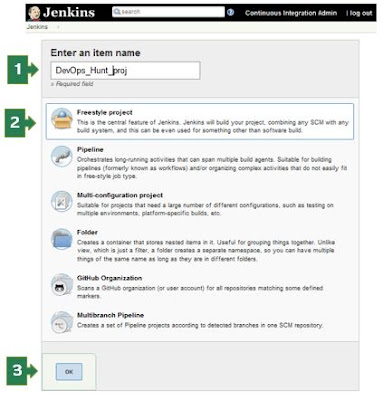
Hello, Dear DevOps Automation enthusiast! This post is intended targeted to those who have just started the journey in the Continuous Integration and Continuous Deployment on the Cloud Platforms or On-premises environments. Pre-requisites Latest Stable version of Jenkins installed   Jenkins Master is in  running state  on your machine/VM/Cloud instance Able to login to the Jenkins Console In the left pane, you can click on 'New Item' or Click on the 'Start Using Jenkins' link. The welcome screen shows a link to create a new job! Jenkins First Job Project creation You need to enter the value for  Name for the build project Type of project Freestyle Project Pipeline Multi-configuration Project Folder GitHub Organization Multibranch Pipeline Enter the name of the project, Select the ' Freestyle project ' for the first time and click on the 'OK' button. New page loads with 6 sections/tabs for build project inputs. Job Configuration Sections In ...

Microk8s Installation on Ubuntu and Configure Kubernetes Dashboard

Image
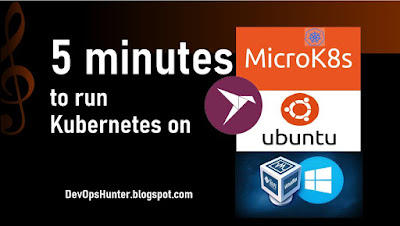
Microk8s is the most happening thing in Kubernetes World. Here I would like to share my exploration of microk8s. Earlier there was 'Minikube' which is targets to Developers community to reduce the operations. Assumption You know how to create a VM using Vagrant, VirtualBox that we had discussed in the other blogposts already so here I'm skipping it. Microk8s installation on Ubuntu  To install you should be super user on your Ubuntu VM sudo -i The snap is a package manager available in all Linux distributions. Here in the Ubuntu 18.04 validating is it available. Check snap package tool available snap version Now we all set, run the install the microk8s command here the --classic is must snap install microk8s --classic --edge Check the version microk8s.kubectl version --short Create an alias to simplify your command alias k="microk8s.kubectl" Let's use k now k get nodes k get nodes -o wide # check the namespaces list k get namespaces k get a...