Jenkins Slave on AWS EC2 instances with SSH configuration
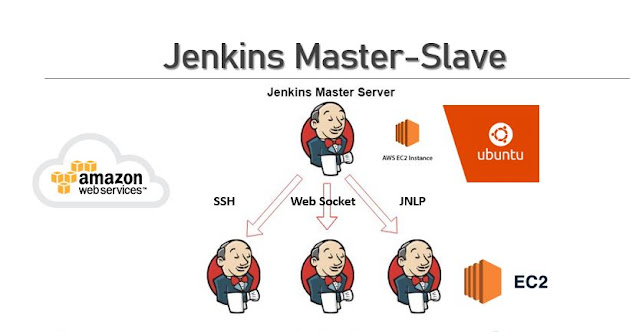
After configuring the Jenkins Master we need to configure the slave or agent on EC2 instance. There are various methods to connect with the Slave node. In this post,
I would like to share the SSH key-based remoting method.
Pre-requisites
- Jenkins Master already Up and Running
- Java (JDK) installed on the Slave node
Here we are in the slave machine and proceed with the following steps for configure a SSH based Jenkins slave.
How to create user and generate ssh-key on Slave?
Login to slave node terminal using ssh or PuTTY switch to root user.
useradd jenkins_slave
mkdir -p /home/jenkins_slave
usermod -d /home/jenkins_slave jenkins_slave
tail -1 /etc/passwd # To check useradded to userlist
Now switch to the newly created user 'jenkins_slave'.
sudo su - jenkins_slaveSSH Key generate for 'jenkins_slave' user with the following command:
cd .ssh
ssh-keygen -t rsa -N ""
The above command will create two files in /home/jenkins_slave/.ssh folder id_rsa (private key) and id_rsa.pub (public key). Now navigate to the .ssh folder then push the public key content into authorized_keys file.
cat id_rsa.pub>authorized_keysNow make the authorized_keys file permission to 700.
chmod 600 authorized_keys
How to Configure known_hosts on Master node?
Login to the "Master machine" and switch to user 'jenkins' and then create .ssh folder. Add the slave host to the known_hosts file using following command(ssh-keyscn).cd .ssh; ssh-keyscan -H 172.31.37.235>>known_hosts chmod 600 known_hosts
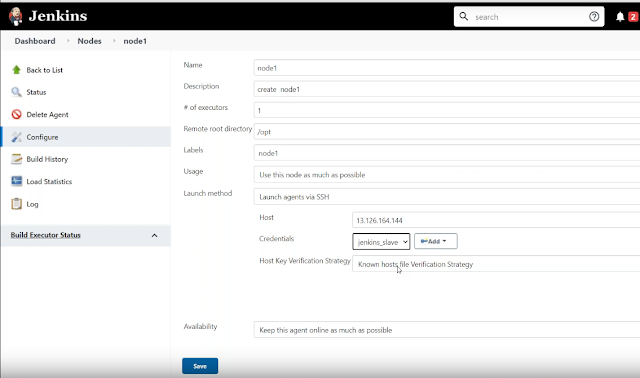
- Name: node1
- Description: Build server
- # of executors: 5
- Remote root directory: /tmp/slave
- Labels: node1
- Usage: Use this node as much as possible
- Launch method : Launch agents via SSH
a. Host: ip-addressb. Credentials: jenkins_slavec. Host Key Verification Strategy: Known host file Verification Strategy
- Availability: Keep this agent online as much as possible
Now go to the slave node and fetch the content of the id_rsa file (that is private key content).
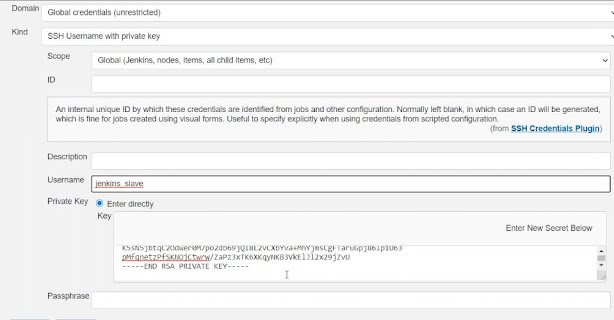
Add Jenkins Global credentials
In the Jenkins Dashboard - On the left pane section select : Credentials
Global Credentials(unrestricted)
Scope: Global
Username
: jenkins_slave (which was created in the above top step)
Private key copy the above content to the Jenkins Private key Text box from the slave node ~/.ssh/id_rsa
After configuring the slave settings, Save the Project.
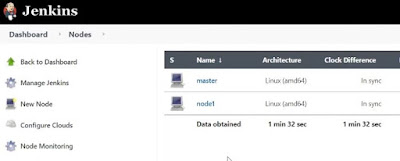
Finally, you can see the Node is active state as shown below:


Comments